本篇博客第一部分受到了这篇博文的启发。
TL; DR
将结论写在前头
事实上,为什么我们很多人在接触一个新的项目时候会遇到各种各样的坑呢?
根据这一次的经历来看,其中的主要原因还是在于本地部署环境的不完备。本次踩坑经历,其实问题就是在 git 啦、gcc 啦等之类看似很常见的东西,实际并没有配置好,然后咱们的项目文档书写者呢,默认了你已经完全配置好这些基本的东西了。唉,但是谁能想到大多数人都会是在虚拟机、wsl、docker上配置,看来 docker 其实更具有实用性,可以当做乐高组件一样,什么时候想用哪几个,直接拼凑起来,就是一个了,不扯远了。
这边先说清楚成功部署APISIX项目,系统需要具备的最基本的东西:
- git的安装
- 与Github进行ssh连接得做好
- git 代理得做好
- 本地的ssh公钥密钥得有(具体查看.ssh文件夹)
- centos7应该安装的基本库
- wget
- unzip
- git
- gcc
- yum update(重要!!!)
第一部分:安装
安装 APISIX 运行环境依赖
基本方法内容来自于官方文档;
安装 etcd
命令:
wget https://github.com/etcd-io/etcd/releases/download/v3.4.13/etcd-v3.4.13-linux-amd64.tar.gz
tar -xvf etcd-v3.4.13-linux-amd64.tar.gz && \
    cd etcd-v3.4.13-linux-amd64 && \
    sudo cp -a etcd etcdctl /usr/bin/
安装 OpenResty
命令:
sudo yum install yum-utils
sudo yum-config-manager --add-repo https://openresty.org/package/centos/openresty.repo

# 安装 OpenResty 和 编译工具
sudo yum install -y openresty curl git gcc openresty-openssl111-devel unzip pcre pcre-devel

# 安装 LuaRocks
curl https://raw.githubusercontent.com/apache/apisix/master/utils/linux-install-luarocks.sh -sL | bash -
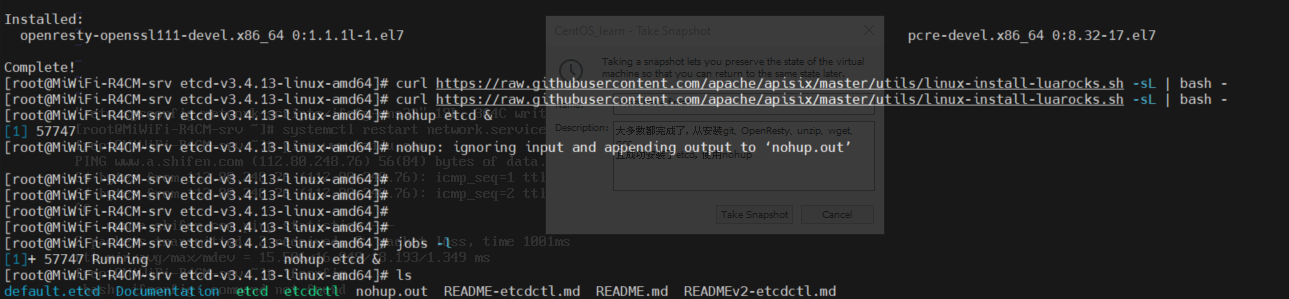
然后才能正常启动 etcd
nohup etcd &
第二部分:踩坑
问题一:
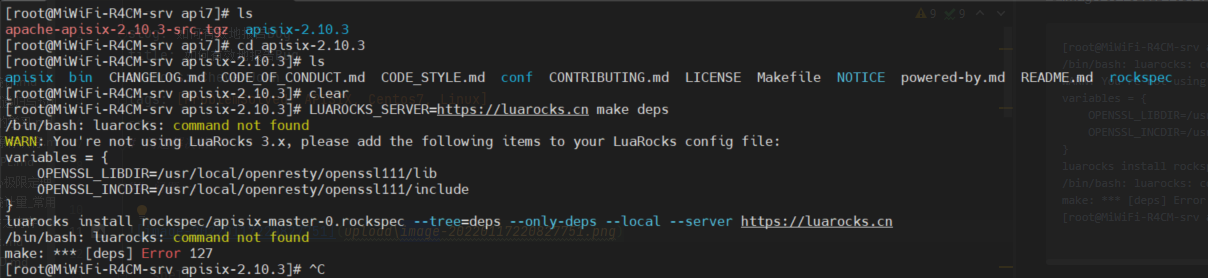
[root@MiWiFi-R4CM-srv apisix-2.10.3]# LUAROCKS_SERVER=https://luarocks.cn make deps
/bin/bash: luarocks: command not found
WARN: You're not using LuaRocks 3.x, please add the following items to your LuaRocks config file:
variables = {
    OPENSSL_LIBDIR=/usr/local/openresty/openssl111/lib
    OPENSSL_INCDIR=/usr/local/openresty/openssl111/include
}
luarocks install rockspec/apisix-master-0.rockspec --tree=deps --only-deps --local --server https://luarocks.cn
/bin/bash: luarocks: command not found
make: *** [deps] Error 127
[root@MiWiFi-R4CM-srv apisix-2.10.3]# ^C
解决方法
curl https://raw.githubusercontent.com/apache/apisix/master/utils/linux-install-luarocks.sh -sL | bash -
问题二(接问题一):
当运行了上面的命令后,又出现新的问题,看来是治标不治本啊
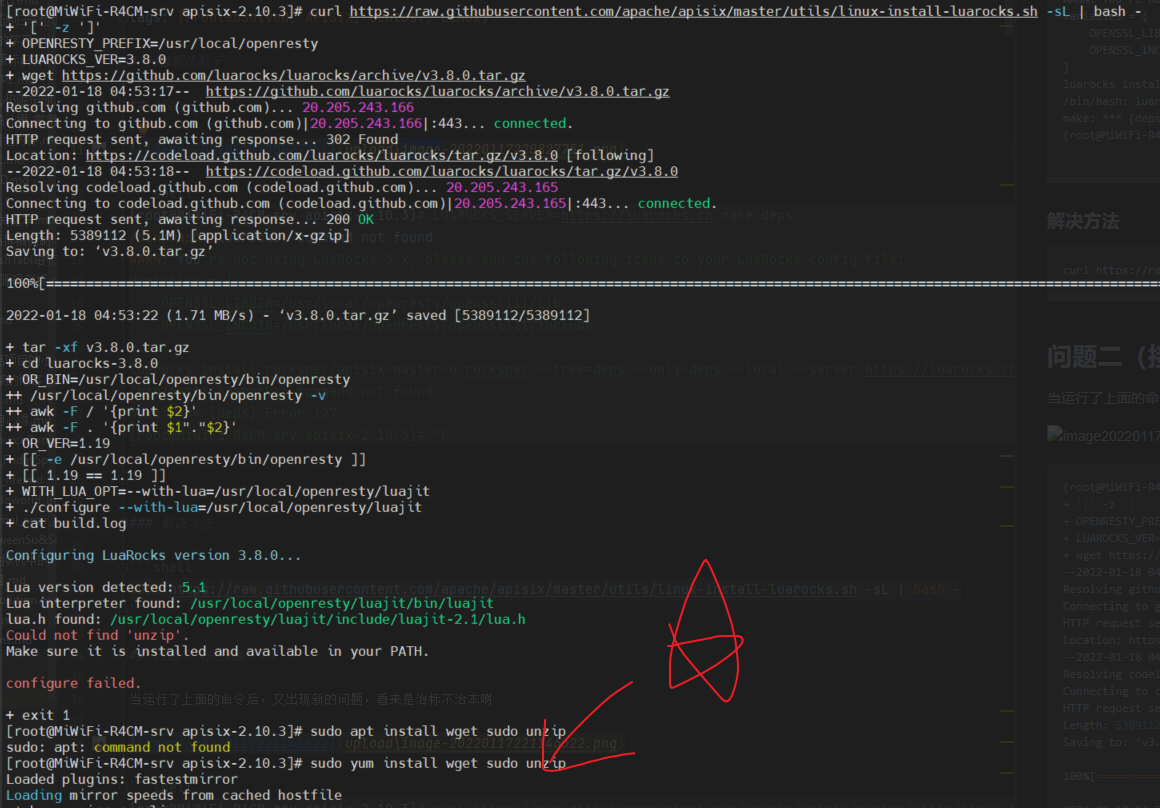
[root@MiWiFi-R4CM-srv apisix-2.10.3]# curl https://raw.githubusercontent.com/apache/apisix/master/utils/linux-install-luarocks.sh -sL | bash -
+ '[' -z ']'
+ OPENRESTY_PREFIX=/usr/local/openresty
+ LUAROCKS_VER=3.8.0
+ wget https://github.com/luarocks/luarocks/archive/v3.8.0.tar.gz
--2022-01-18 04:53:17--  https://github.com/luarocks/luarocks/archive/v3.8.0.tar.gz
Resolving github.com (github.com)... 20.205.243.166
Connecting to github.com (github.com)|20.205.243.166|:443... connected.
HTTP request sent, awaiting response... 302 Found
Location: https://codeload.github.com/luarocks/luarocks/tar.gz/v3.8.0 [following]
--2022-01-18 04:53:18--  https://codeload.github.com/luarocks/luarocks/tar.gz/v3.8.0
Resolving codeload.github.com (codeload.github.com)... 20.205.243.165
Connecting to codeload.github.com (codeload.github.com)|20.205.243.165|:443... connected.
HTTP request sent, awaiting response... 200 OK
Length: 5389112 (5.1M) [application/x-gzip]
Saving to: ‘v3.8.0.tar.gz’

100%[====================================================================================================================================================================>] 5,389,112   1.71MB/s   in 3.0s

2022-01-18 04:53:22 (1.71 MB/s) - ‘v3.8.0.tar.gz’ saved [5389112/5389112]

+ tar -xf v3.8.0.tar.gz
+ cd luarocks-3.8.0
+ OR_BIN=/usr/local/openresty/bin/openresty
++ /usr/local/openresty/bin/openresty -v
++ awk -F / '{print $2}'
++ awk -F . '{print $1"."$2}'
+ OR_VER=1.19
+ [[ -e /usr/local/openresty/bin/openresty ]]
+ [[ 1.19 == 1.19 ]]
+ WITH_LUA_OPT=--with-lua=/usr/local/openresty/luajit
+ ./configure --with-lua=/usr/local/openresty/luajit
+ cat build.log

Configuring LuaRocks version 3.8.0...

Lua version detected: 5.1
Lua interpreter found: /usr/local/openresty/luajit/bin/luajit
lua.h found: /usr/local/openresty/luajit/include/luajit-2.1/lua.h
Could not find 'unzip'.
Make sure it is installed and available in your PATH.

configure failed.

+ exit 1
[root@MiWiFi-R4CM-srv apisix-2.10.3]# sudo yum install wget sudo unzip
Loaded plugins: fastestmirror
Loading mirror speeds from cached hostfile
 * base: mirrors.aliyun.com
 * extras: mirrors.163.com
 * updates: mirrors.163.com
解决方法:
sudo yum install wget sudo unzip
问题三(接问题二):
继续运行
[root@MiWiFi-R4CM-srv apisix-2.10.3]# curl https://raw.githubusercontent.com/apache/apisix/master/utils/linux-install-luarocks.sh -sL | bash -
发现还有问题

解决方法:
yum -y install gcc
直接解决了问题
[root@MiWiFi-R4CM-srv apisix-2.10.3]# yum -y install gcc
Loaded plugins: fastestmirror
Loading mirror speeds from cached hostfile
* base: mirrors.aliyun.com
* extras: mirrors.163.com
* updates: mirrors.163.com
Resolving Dependencies
--> Running transaction check
---> Package gcc.x86_64 0:4.8.5-44.el7 will be installed
--> Processing Dependency: cpp = 4.8.5-44.el7 for package: gcc-4.8.5-44.el7.x86_64
--> Processing Dependency: glibc-devel >= 2.2.90-12 for package: gcc-4.8.5-44.el7.x86_64
--> Processing Dependency: libmpfr.so.4()(64bit) for package: gcc-4.8.5-44.el7.x86_64
--> Processing Dependency: libmpc.so.3()(64bit) for package: gcc-4.8.5-44.el7.x86_64
--> Running transaction check
---> Package cpp.x86_64 0:4.8.5-44.el7 will be installed
---> Package glibc-devel.x86_64 0:2.17-325.el7_9 will be installed
--> Processing Dependency: glibc-headers = 2.17-325.el7_9 for package: glibc-devel-2.17-325.el7_9.x86_64
--> Processing Dependency: glibc = 2.17-325.el7_9 for package: glibc-devel-2.17-325.el7_9.x86_64
--> Processing Dependency: glibc-headers for package: glibc-devel-2.17-325.el7_9.x86_64
---> Package libmpc.x86_64 0:1.0.1-3.el7 will be installed
---> Package mpfr.x86_64 0:3.1.1-4.el7 will be installed
--> Running transaction check
---> Package glibc.x86_64 0:2.17-317.el7 will be updated
--> Processing Dependency: glibc = 2.17-317.el7 for package: glibc-common-2.17-317.el7.x86_64
---> Package glibc.x86_64 0:2.17-325.el7_9 will be an update
---> Package glibc-headers.x86_64 0:2.17-325.el7_9 will be installed
--> Processing Dependency: kernel-headers >= 2.2.1 for package: glibc-headers-2.17-325.el7_9.x86_64
--> Processing Dependency: kernel-headers for package: glibc-headers-2.17-325.el7_9.x86_64
--> Running transaction check
---> Package glibc-common.x86_64 0:2.17-317.el7 will be updated
---> Package glibc-common.x86_64 0:2.17-325.el7_9 will be an update
---> Package kernel-headers.x86_64 0:3.10.0-1160.49.1.el7 will be installed
--> Finished Dependency Resolution
Dependencies Resolved
==============================================================================================================================================================================================================
Package Arch Version Repository Size
==============================================================================================================================================================================================================
Installing:
gcc x86_64 4.8.5-44.el7 base 16 M
Installing for dependencies:
cpp x86_64 4.8.5-44.el7 base 5.9 M
glibc-devel x86_64 2.17-325.el7_9 updates 1.1 M
glibc-headers x86_64 2.17-325.el7_9 updates 691 k
kernel-headers x86_64 3.10.0-1160.49.1.el7 updates 9.0 M
libmpc x86_64 1.0.1-3.el7 base 51 k
mpfr x86_64 3.1.1-4.el7 base 203 k
Updating for dependencies:
glibc x86_64 2.17-325.el7_9 updates 3.6 M
glibc-common x86_64 2.17-325.el7_9 updates 12 M
Transaction Summary
==============================================================================================================================================================================================================
Install 1 Package (+6 Dependent packages)
Upgrade ( 2 Dependent packages)
Total download size: 48 M
Downloading packages:
Delta RPMs disabled because /usr/bin/applydeltarpm not installed.
(1/9): cpp-4.8.5-44.el7.x86_64.rpm | 5.9 MB 00:00:04
(2/9): glibc-headers-2.17-325.el7_9.x86_64.rpm | 691 kB 00:00:00
(3/9): glibc-devel-2.17-325.el7_9.x86_64.rpm | 1.1 MB 00:00:05
(4/9): libmpc-1.0.1-3.el7.x86_64.rpm | 51 kB 00:00:00
(5/9): mpfr-3.1.1-4.el7.x86_64.rpm | 203 kB 00:00:00
(6/9): glibc-common-2.17-325.el7_9.x86_64.rpm | 12 MB 00:00:08
(7/9): gcc-4.8.5-44.el7.x86_64.rpm | 16 MB 00:00:08
(8/9): kernel-headers-3.10.0-1160.49.1.el7.x86_64.rpm | 9.0 MB 00:00:04
(9/9): glibc-2.17-325.el7_9.x86_64.rpm | 3.6 MB 00:00:10
--------------------------------------------------------------------------------------------------------------------------------------------------------------------------------------------------------------
Total 4.7 MB/s | 48 MB 00:00:10
Running transaction check
Running transaction test
Transaction test succeeded
Running transaction
Updating : glibc-2.17-325.el7_9.x86_64 1/11
Updating : glibc-common-2.17-325.el7_9.x86_64 2/11
Installing : mpfr-3.1.1-4.el7.x86_64 3/11
Installing : libmpc-1.0.1-3.el7.x86_64 4/11
Installing : cpp-4.8.5-44.el7.x86_64 5/11
Installing : kernel-headers-3.10.0-1160.49.1.el7.x86_64 6/11
Installing : glibc-headers-2.17-325.el7_9.x86_64 7/11
Installing : glibc-devel-2.17-325.el7_9.x86_64 8/11
Installing : gcc-4.8.5-44.el7.x86_64 9/11
Cleanup : glibc-2.17-317.el7.x86_64 10/11
Cleanup : glibc-common-2.17-317.el7.x86_64 11/11
Verifying : mpfr-3.1.1-4.el7.x86_64 1/11
Verifying : glibc-devel-2.17-325.el7_9.x86_64 2/11
Verifying : gcc-4.8.5-44.el7.x86_64 3/11
Verifying : glibc-headers-2.17-325.el7_9.x86_64 4/11
Verifying : kernel-headers-3.10.0-1160.49.1.el7.x86_64 5/11
Verifying : libmpc-1.0.1-3.el7.x86_64 6/11
Verifying : glibc-common-2.17-325.el7_9.x86_64 7/11
Verifying : glibc-2.17-325.el7_9.x86_64 8/11
Verifying : cpp-4.8.5-44.el7.x86_64 9/11
Verifying : glibc-2.17-317.el7.x86_64 10/11
Verifying : glibc-common-2.17-317.el7.x86_64 11/11
Installed:
gcc.x86_64 0:4.8.5-44.el7
Dependency Installed:
cpp.x86_64 0:4.8.5-44.el7 glibc-devel.x86_64 0:2.17-325.el7_9 glibc-headers.x86_64 0:2.17-325.el7_9 kernel-headers.x86_64 0:3.10.0-1160.49.1.el7 libmpc.x86_64 0:1.0.1-3.el7 mpfr.x86_64 0:3.1.1-4.el7
Dependency Updated:
glibc.x86_64 0:2.17-325.el7_9 glibc-common.x86_64 0:2.17-325.el7_9
Complete!

问题四(搁浅中......):
这边的LUAROCKS是针对于
开始LUAROCKS_SERVER......
[root@MiWiFi-R4CM-srv apisix-2.10.3]# LUAROCKS_SERVER=https://luarocks.cn make deps
爆出问题

分析问题:
[root@MiWiFi-R4CM-srv apisix-2.10.3]# LUAROCKS_SERVER=https://luarocks.cn make deps
…………………………………………………………………………………………………………………………………………………………………………
lua-resty-dns-client 5.2.0-1 depends on luaxxhash >= 1.0 (not installed)
Installing https://luarocks.cn/luaxxhash-1.0.0-1.rockspec

Error: Failed installing dependency: https://luarocks.cn/lua-resty-dns-client-5.2.0-1.src.rock - Failed installing dependency: https://luarocks.cn/luaxxhash-1.0.0-1.rockspec - 'git' program not found. Make sure Git is installed and is available in your PATH (or you may want to edit the 'variables.GIT' value in file '/root/.luarocks/config-5.1.lua')
make: *** [deps] Error 1
[root@MiWiFi-R4CM-srv apisix-2.10.3]# yum install -y git
很明显就是没有安装配置好git嘛
lua-resty-dns-client 5.2.0-1 depends on lua >= 5.1, < 5.4 (5.1-1 provided by VM)
lua-resty-dns-client 5.2.0-1 depends on penlight ~> 1 (1.12.0-1 installed)
lua-resty-dns-client 5.2.0-1 depends on lrandom (20180729-1 installed)
lua-resty-dns-client 5.2.0-1 depends on lua-resty-timer ~> 1 (1.1.0-1 installed)
lua-resty-dns-client 5.2.0-1 depends on binaryheap >= 0.4 (0.4-1 installed)
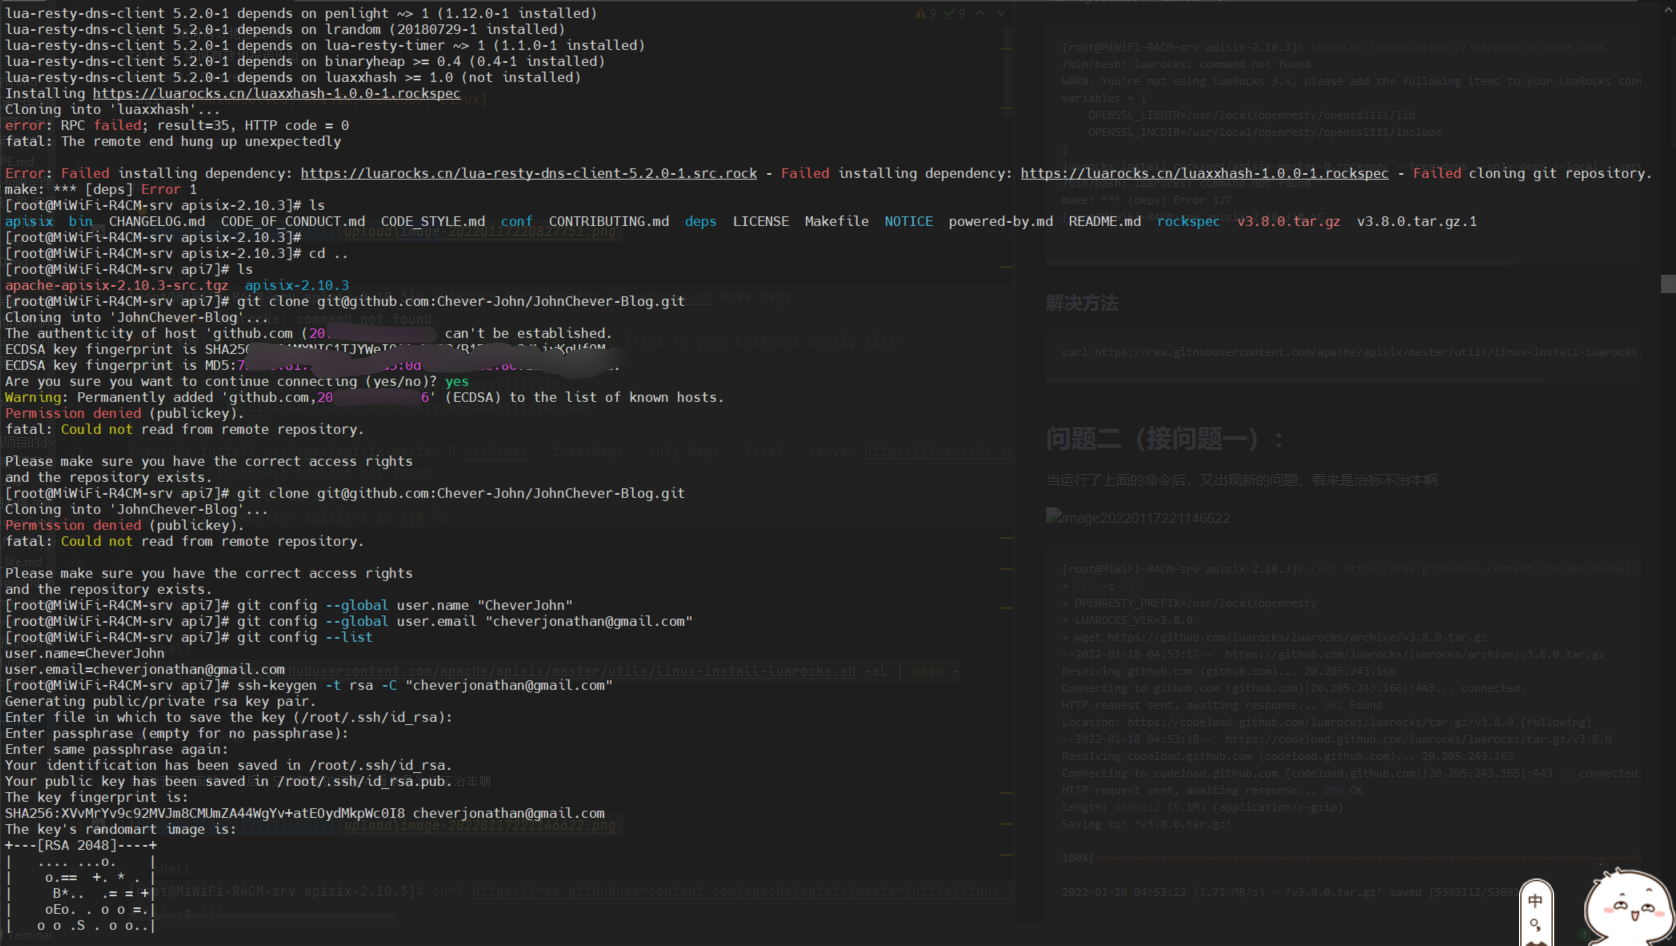
lua-resty-dns-client 5.2.0-1 depends on luaxxhash >= 1.0 (not installed)
Installing https://luarocks.cn/luaxxhash-1.0.0-1.rockspec
Cloning into 'luaxxhash'...
error: RPC failed; result=35, HTTP code = 0
fatal: The remote end hung up unexpectedly
Error: Failed installing dependency: https://luarocks.cn/lua-resty-dns-client-5.2.0-1.src.rock - Failed installing dependency: https://luarocks.cn/luaxxhash-1.0.0-1.rockspec - Failed cloning git repository.
make: *** [deps] Error 1
[root@MiWiFi-R4CM-srv apisix-2.10.3]# ls
apisix bin CHANGELOG.md CODE_OF_CONDUCT.md CODE_STYLE.md conf CONTRIBUTING.md deps LICENSE Makefile NOTICE powered-by.md README.md rockspec v3.8.0.tar.gz v3.8.0.tar.gz.1
[root@MiWiFi-R4CM-srv apisix-2.10.3]#
[root@MiWiFi-R4CM-srv apisix-2.10.3]# cd ..
[root@MiWiFi-R4CM-srv api7]# ls
apache-apisix-2.10.3-src.tgz apisix-2.10.3
[root@MiWiFi-R4CM-srv api7]# git clone git@github.com:Chever-John/JohnChever-Blog.git
Cloning into 'JohnChever-Blog'...
The authenticity of host 'github.com (20.205.243.166)' can't be established.
ECDSA key fingerprint is SHA256:p2QAMXNIC1TJYWeIOttrVc98/R1BUFWu3/LiyKgUfQM.
ECDSA key fingerprint is MD5:7b:99:81:1e:4c:91:a5:0d:5a:2e:2e:80:13:3f:24:ca.
Are you sure you want to continue connecting (yes/no)? yes
Warning: Permanently added 'github.com,20.205.243.166' (ECDSA) to the list of known hosts.
Permission denied (publickey).
fatal: Could not read from remote repository.
Please make sure you have the correct access rights
and the repository exists.
[root@MiWiFi-R4CM-srv api7]# git clone git@github.com:Chever-John/JohnChever-Blog.git
Cloning into 'JohnChever-Blog'...
Permission denied (publickey).
fatal: Could not read from remote repository.
Please make sure you have the correct access rights
and the repository exists.
[root@MiWiFi-R4CM-srv api7]# git config --global user.name "CheverJohn"
[root@MiWiFi-R4CM-srv api7]# git config --global user.email "cheverjonathan@gmail.com"
[root@MiWiFi-R4CM-srv api7]# git config --list
user.name=CheverJohn
user.email=cheverjonathan@gmail.com
[root@MiWiFi-R4CM-srv api7]# ssh-keygen -t rsa -C "cheverjonathan@gmail.com"
Generating public/private rsa key pair.
Enter file in which to save the key (/root/.ssh/id_rsa):
Enter passphrase (empty for no passphrase):
Enter same passphrase again:
Your identification has been saved in /root/.ssh/id_rsa.
Your public key has been saved in /root/.ssh/id_rsa.pub.
The key fingerprint is:
SHA256:XVvMrYv9c92MVJm8CMUmZA44WgYv+atEOydMkpWc0I8 cheverjonathan@gmail.com
The key's randomart image is:
+---[RSA 2048]----+
| .... ...o. |
| o.== +. * . |
| B*.. .= = +|
| oEo. . o o =.|
| o o .S . o o..|
| = . . +.o |
| * o ..ooo|
| . = .o=|
| . +|
+----[SHA256]-----+
[root@MiWiFi-R4CM-srv api7]# cat /root/.ssh
cat: /root/.ssh: Is a directory
[root@MiWiFi-R4CM-srv api7]# ls
apache-apisix-2.10.3-src.tgz apisix-2.10.3
[root@MiWiFi-R4CM-srv api7]# cd /root/.ssh
[root@MiWiFi-R4CM-srv .ssh]# ls
id_rsa id_rsa.pub known_hosts
[root@MiWiFi-R4CM-srv .ssh]# cat id_rsa.pub
接下来显示就是生成的ssh密钥了,将其复制到github上的ssh里即可
继续LUAROCKS_SERVER......
LUAROCKS_SERVER=https://luarocks.cn make deps
还是出现了问题

怀疑是git代理的问题!!!
这边开始暂时不搞apisix中的LUAROCKS了,开始按照官网的需求准备。
未解决!!!
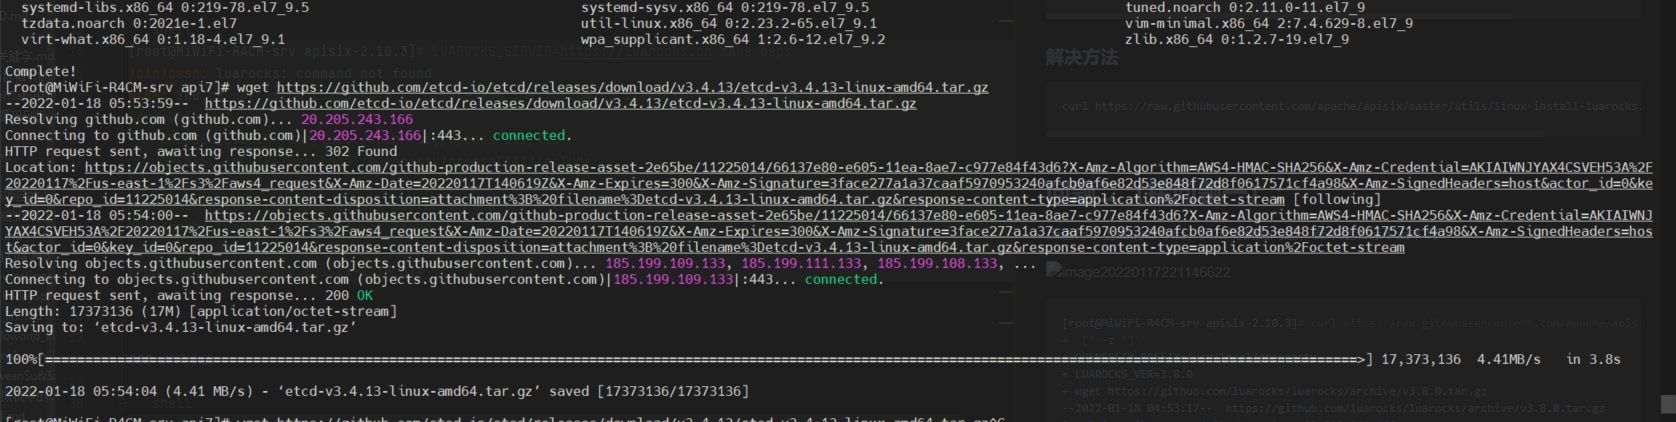
问题五:前提需求准备中的wget问题
然后遇到了wget问题
如果使用wget的话,会出现一个

遇到Unable to establish SSL connection的报错
这个时候,只需要轻轻yum update即可,原因是未更新前的centos里的库大部分是老旧的,特别是导致这个问题的openssl。
此处(指yum update)收到了该链接的灵感。
当我们yum update之后,即可成功
然后运行wget,至此wget https://github.com/etcd-io/etcd/releases/download/v3.4.13/etcd-v3.4.13-linux-amd64.tar.gz完美解决,结束了。
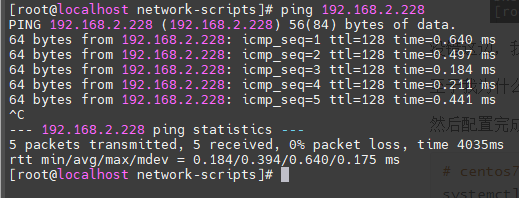
成功结束的样子
问题六:继续回到问题四
LUAROCKS_SERVER继续在apisix-2.10.3文件中进行运行
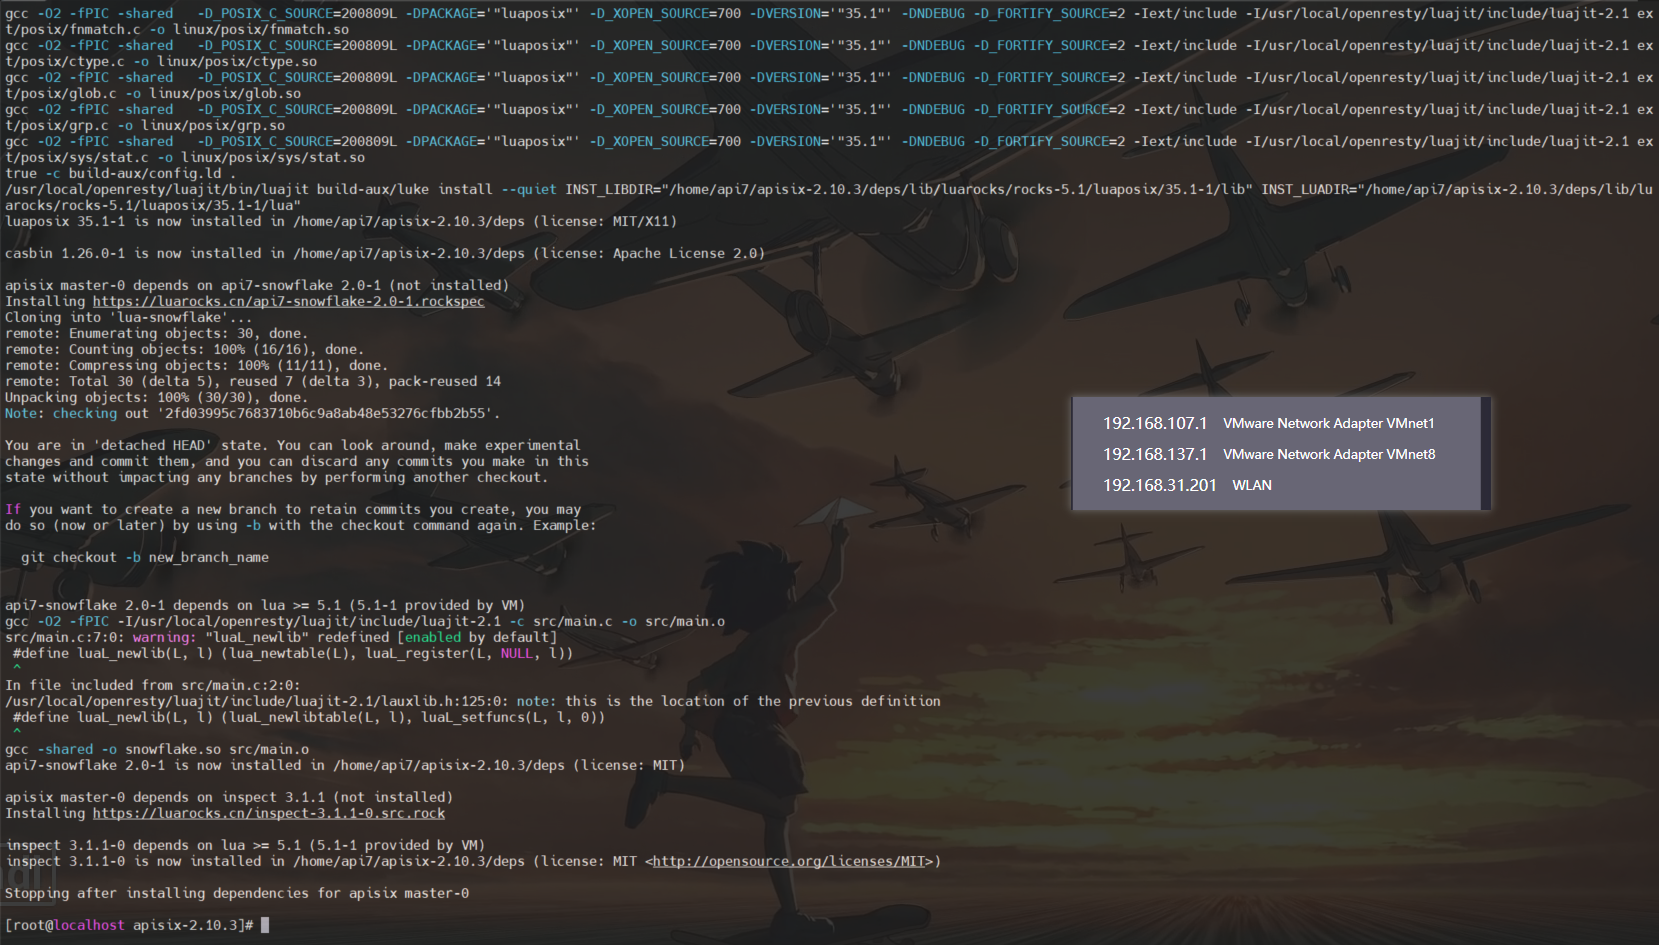
// 遇到问题!
apisix master-0 depends on lua-resty-ngxvar 0.5.2 (not installed)
Installing https://luarocks.cn/lua-resty-ngxvar-0.5.2-0.rockspec
Cloning into 'lua-var-nginx-module'...
fatal: unable to access 'https://github.com/api7/lua-var-nginx-module/': Encountered end of file

Error: Failed installing dependency: https://luarocks.cn/lua-resty-ngxvar-0.5.2-0.rockspec - Failed cloning git repository.
make: *** [deps] Error 1
[root@MiWiFi-R4CM-srv apisix-2.10.3]#
完成etcd的安装
这边根据链接讲的东西从而进行etcd的安装。
All Done
上一张证明自己All Done的截图照片
试试证明确实使用git proxy代理好,一下子就能解决所有问题了。

列出一些算是对我有所帮助的链接地址吧
https://www.mihu.live/archives/208/ https://zhuanlan.zhihu.com/p/120038973
晚上再来把文字搞好看一点

请忽略的etcd文件夹目录,刚刚运行起etcd了。so就急匆匆curl咯,根据这处链接及其提供的命令和结果,得以判断咱们的Apache APISIX是否已经成功启动。